To create LDAP (OID) entry in BI Repository
a) Open repository (offline/online mode) from OBI
Administration Tool .
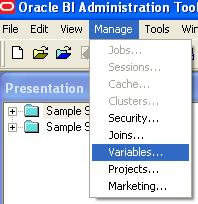
Manage -> Security to open Security
Manager in BI Administration Tool
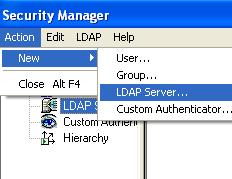
Action -> New -> LDAP
Server to add new ldap server

.
b) In new pop up window enter OID server details
where
- HostName is machine name on which OID is running
- Port Number is Port on which OID is listening,
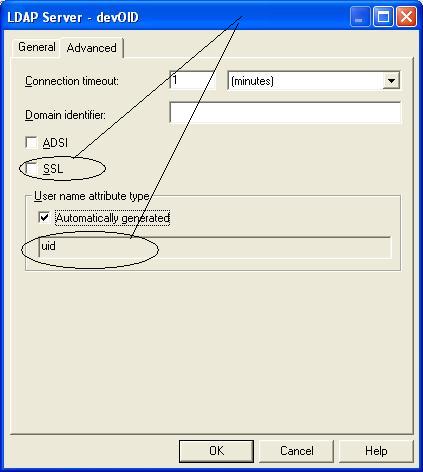
if you are planning to use SSL port of OID change
select SSL in Advanced Tab as shown below
- Base Dn is location in OID tree under which all users
sit (user who wish to login through OBI should be under this tree in OID)
- Bind Dn is distinguished name of supeuser usually orcladmin
(super user)
- Bind Password - is password of orcladmin user

Test OID connection by clicking on “Test
Connection” button

- If UserName is OID is recognized by cn
and NOT uid then change it in advanced name. (OID is using cn
or uid as its userName is determined by orclcommonnicknameattribute
value in OID)
- If OID is listening on SSL only and you entered SSL port in
General Tab then select SSL checkbox in above screen
.
Note - OBI Server should be able to connect to OID server
(If there is any firewall between BI Server and OID
server open OID port across firewall) .
2. Configure initialization block for user authentication
2.1 Administration Tool -> Manage
-> Variables ->

.
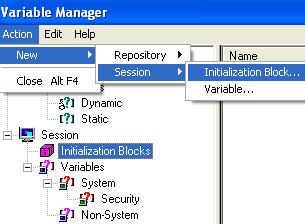
2.2 Action -> New -> Session -> Initialization
Block

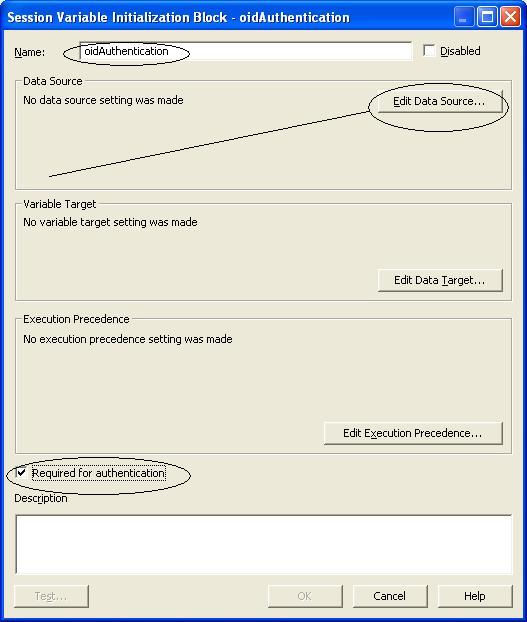
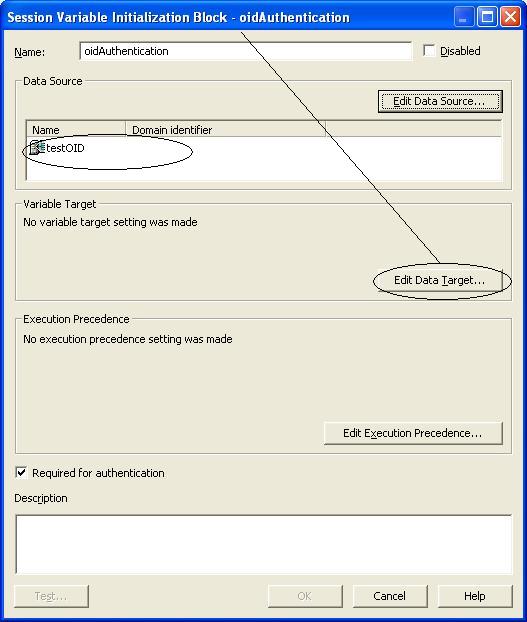
2.3 In Session Variable Initialization Block window, enter Name
for session variable and select “Required for Authentication”
check box as shown in screenshot

2.4 Now click on “Edit Data Source” button
as shows in above screen shot
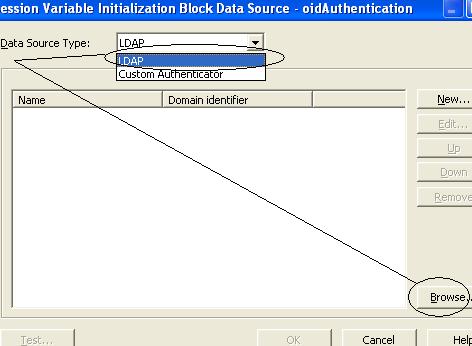
2.5 From drop down list select “LDAP” as
datasource and select Browse as shown in below screenshot

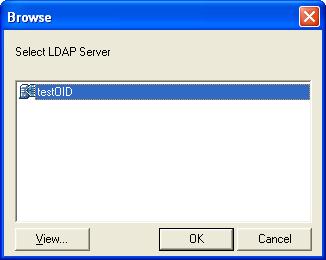
2.6 Select OID server which you created in
step1 above and click OK

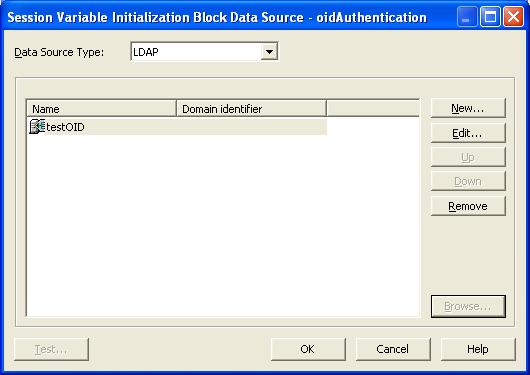
2.7 Click OK on next screen

2.8 Now click on “Edit Data Target” button
on Session Variable Initialization Block screen

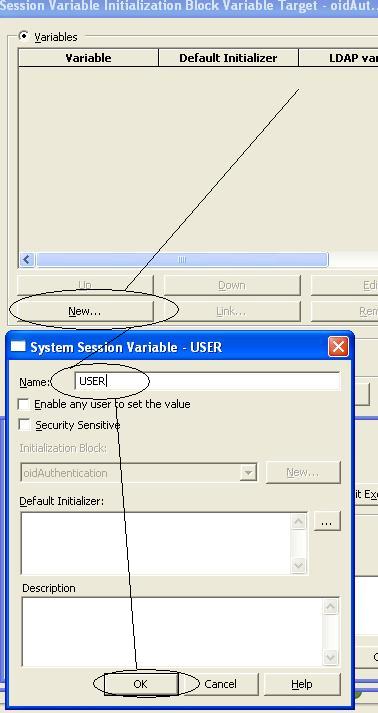
2.9 Click on New and enter Name as USER
in “System Session Variable” and click OK as
shows in screenshot below

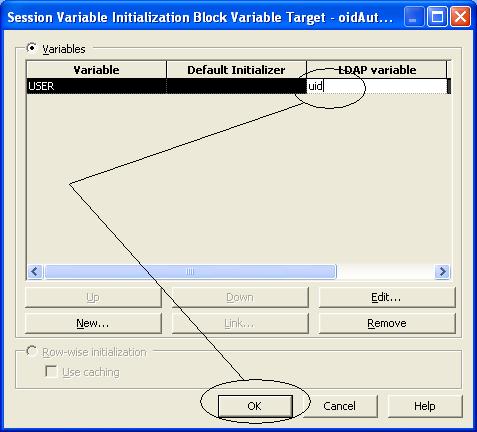
2.10 Enter the value of LDAP variable .
This value is usually uid or cn (check value
of orclcommonnicknameattribute in OID) and click OK
as shown in below screenshot

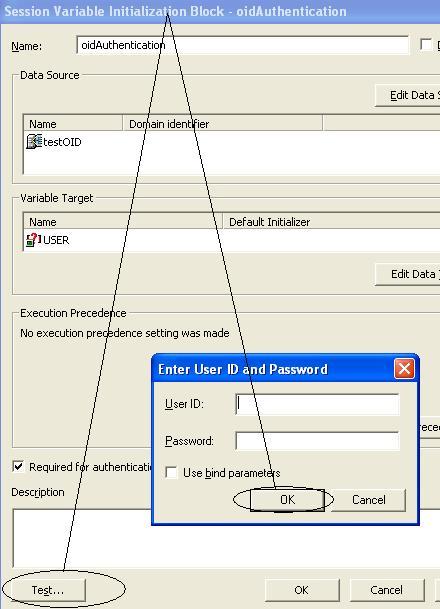
2.11 Finally test your setup by clicking
on Test button . Enter any valid Username, Password when
prompted

.


No comments :
Post a Comment